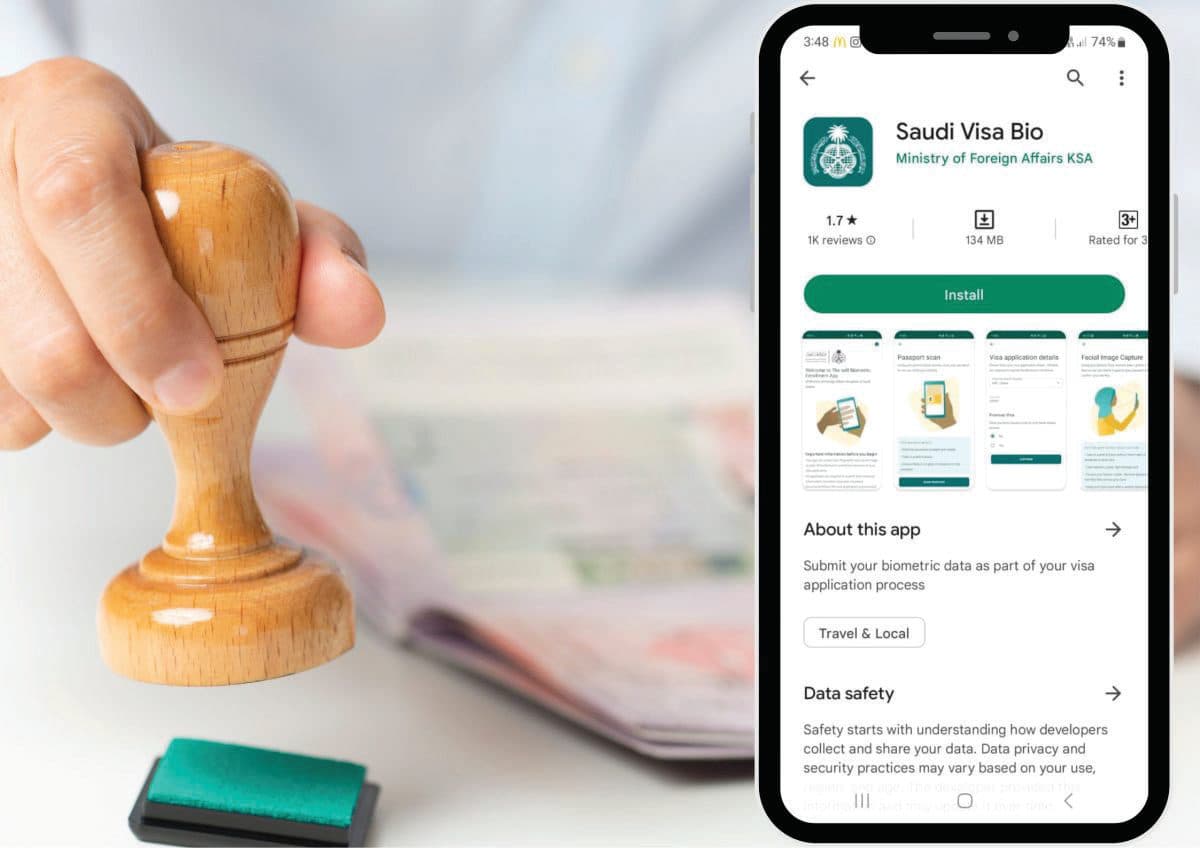
The Saudi Visa Bio app, launched by the Saudi Ministry of Foreign Affairs (MOFA), streamlines biometric data collection for Hajj visa applicants. It offers a fast, secure, and convenient way to submit your fingerprints and facial recognition data, both key requirements of Saudi Arabia's visa application process.
Key Features and Benefits
Biometric Submission
Submit your fingerprints and facial scan remotely.
Faster Processing
Reduces delays and minimises errors.
Secure and Convenient
Enhances security while removing the need for in-person biometric collection.
Secure Processing
The app uses high-level encryption to transmit and store biometric data securely, protecting your information from unauthorised access.
Language Support
The app is available in multiple languages, including Arabic and English.
Free Service
There is no cost for this process.
Download the App and Create an Account
Using the Saudi Visa Bio app is straightforward. These are the general steps to complete your biometrics through the app:
- Download the Saudi Visa Bio app on your smartphone. It is available on the Google Play Store for Android users and the Apple App Store for iOS users. Only download it from your phone's official app store.
- Open the app once it is installed and create a new account using your details exactly as they appear on your passport, along with your Nusuk email address.
If you are having issues with your Nusuk email address or cannot access it, you can use another valid email address.
Step One: Passport Scan
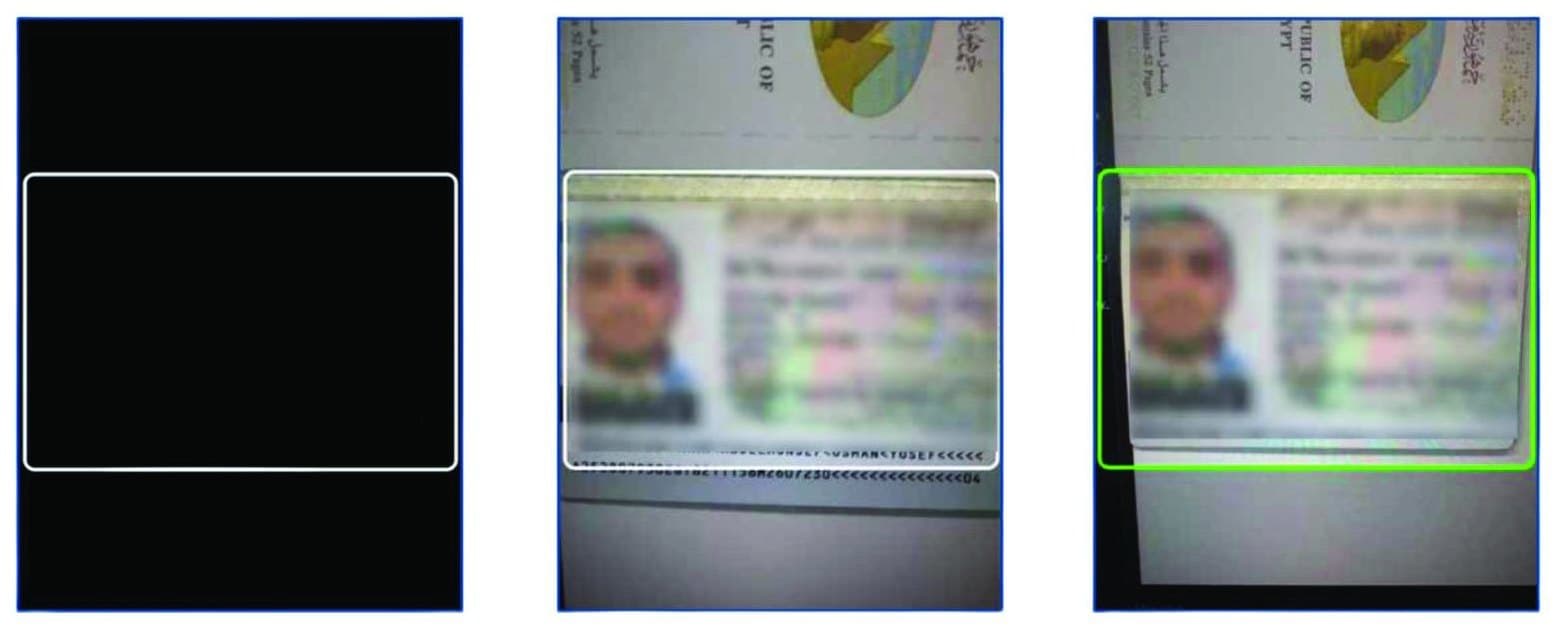
Using your phone's back camera, scan your passport so your identity can be verified.
For the best scan
- Make sure there is no glare or shadow on the passport.
- Hold the document straight and steady.
- Scan it in a well-lit place.
Step Two: Face Capture
Using your phone's front camera, take a photo of your face so it can be checked against your passport to confirm your identity.
For the best facial image
- Make sure your face is fully visible.
- Remove glasses, and move any hair that falls across your face.
- Take the photo in a well-lit place, without direct light or shadows on your face.
- Stand against a light-coloured, plain background (ideally white).
- Keep your eyes open with a neutral expression (do not smile).
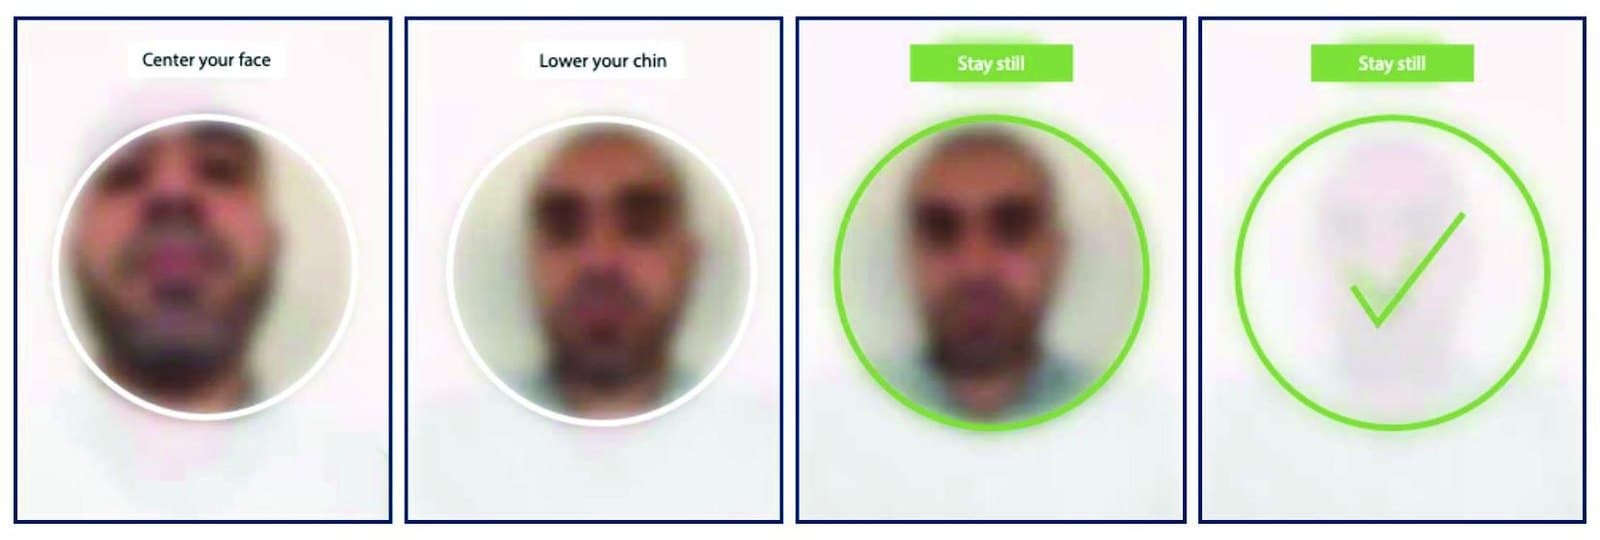
Step Three: Fingerprint Scan
The app captures your thumbs and four fingers of each hand using the phone's back camera. Place your thumb or hand inside the overlay on the camera view, and the app captures it automatically.
Right thumb
Hold the phone in your left hand, using the back camera, and place your right thumb in the overlay.
Left thumb
Hold the phone in your right hand, using the back camera, and place your left thumb in the overlay.
Right hand, four fingers
Hold the phone in your left hand, using the back camera, and place your right hand in the overlay.
Left hand, four fingers
Hold the phone in your right hand, using the back camera, and place your left hand in the overlay.
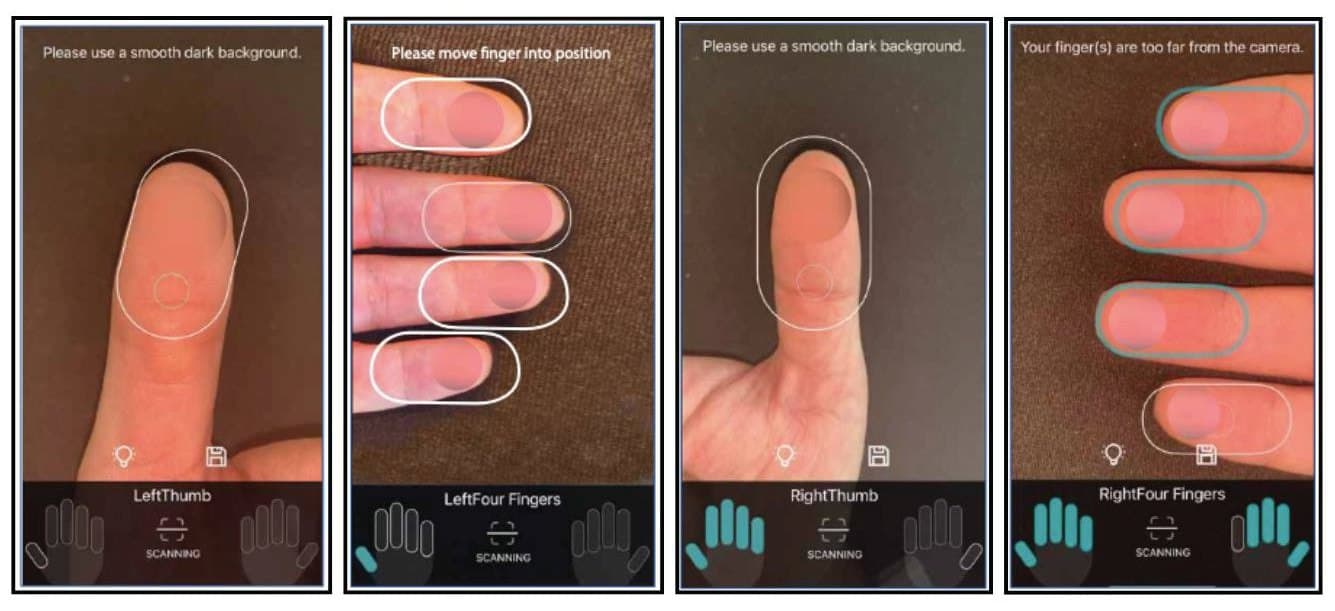
Best practices for good fingerprint capture
- Make sure the background is dark (different from your skin colour), plain, and free of clutter.
- Always try to keep your hand or finger inside the overlay on the camera view.
- Try to keep your hand still throughout the capture.
Troubleshooting Biometrics Issues
If you are having difficulties, follow these proven tips:
Preferred devices
Newer Android phones tend to perform best. Apple devices may cause reflection issues; increasing the camera resolution to 4K often improves results.
Moisturise your fingertips
This improves contour reflections and makes the image clearer.
Camera positioning
- Keep your fingers close to the camera and close together.
- Move the phone closer to your fingers, not further away.
- Make sure the app shows a green marker confirming a successful fingerprint capture.
Lighting and background
- Avoid bright lighting and reflections.
- Use a dark or black background for the best contrast.
Switch devices
If one device keeps failing, try a different one.
Elderly users
Fingerprints may be less prominent, so extra time and care may be needed.
App troubleshooting
Delete the app, reinstall it, and resubmit your images. This often resolves persistent issues. If your application was declined, following this process usually works on the second attempt.
Exceptional cases
People with scarred, disfigured, or amputated fingers have successfully completed their submission after multiple attempts.
Exceptional Cases
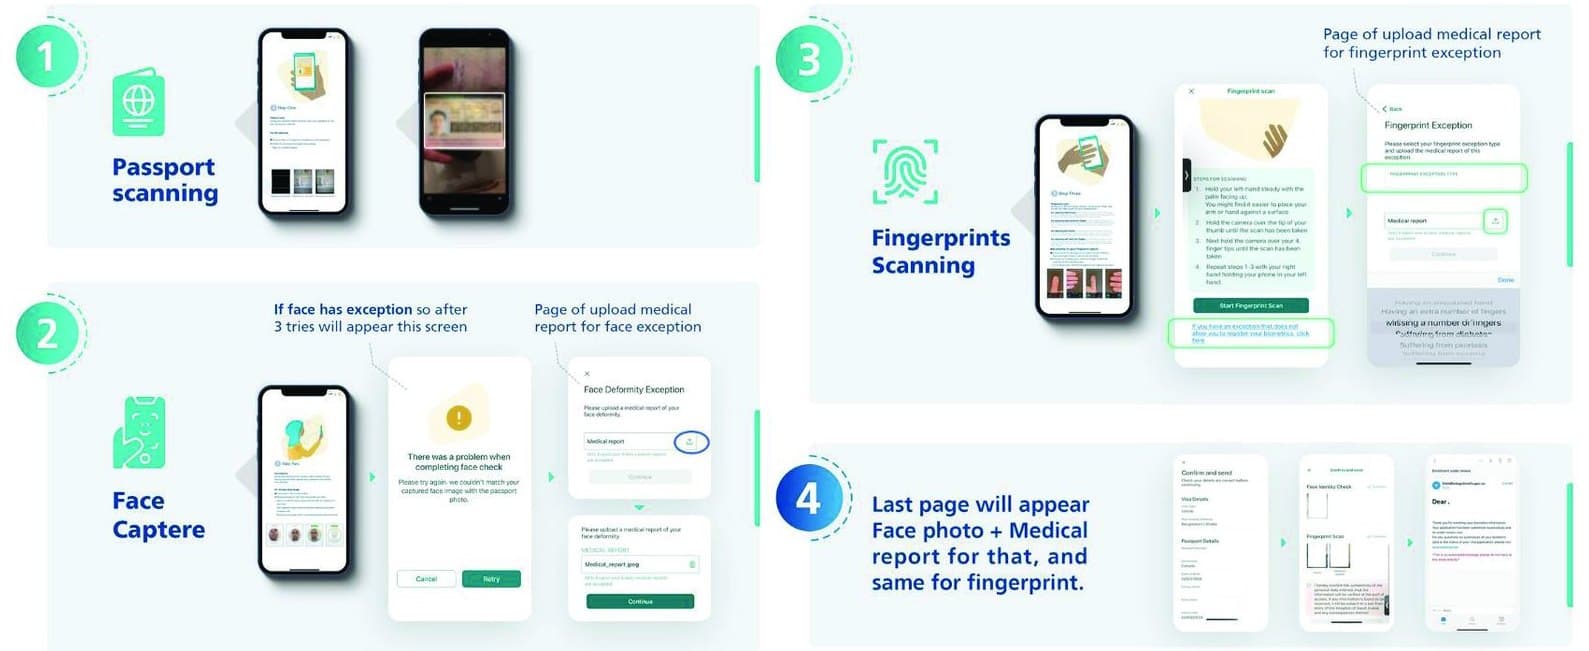
If your biometrics cannot be completed, you can upload a medical report through the app.
- Passport scanning: scan your passport as usual.
- Face capture: if there is a problem with your face check after three tries, an exception screen appears, followed by a page where you can upload a medical report for a face exception.
- Fingerprint scanning: on the fingerprint scan screen, tap the link for an exception that does not allow you to register your biometrics. On the Fingerprint Exception page, select your exception type (for example, an amputated hand or an extra or missing number of fingers) and upload your medical report.
- Final page: your face photo and medical report appear for review, and the same applies for your fingerprints.
Confirmation and Your eVisa
Once your biometric data is submitted through the app, you will receive one of the following email notifications:
Application Submitted Successfully
Application Under Review
Please be patient. Confirmation will follow.
Application Rejected
Delete the app, reinstall it, and resubmit your data.
| Sender | Email address |
|---|---|
| MOFA Visa App | MofaBioApp@mofa.gov.sa |
| MOFA Visa Services | no-reply@mofa.gov.sa |
The look of these emails may vary.
Your Saudi eVisa
Once approved, your Saudi eVisa will be sent to you by email. The look of this email and of the eVisa itself may vary.
Keep a digital copy and a printout of your eVisa with you when you travel.
Checking Your Visa Status
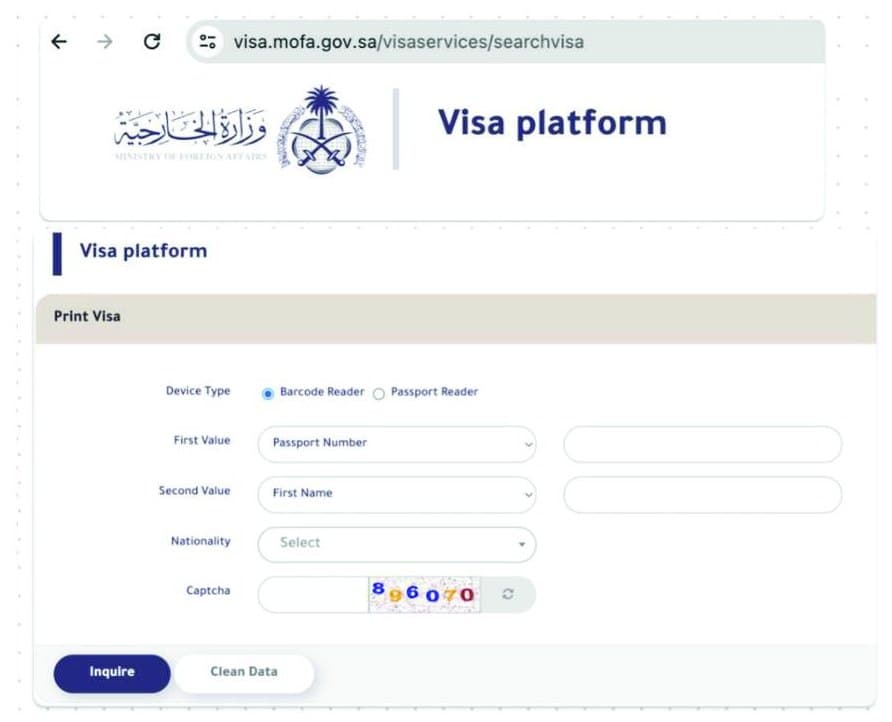
If you are having trouble downloading your visa, go directly to the official Ministry of Foreign Affairs (MOFA) visa portal: https://visa.mofa.gov.sa/visaservices/searchvisa
The status on the Nusuk platform often shows "Pending" or "Send to Embassy" even when the visa has already been issued. Always cross-check using the MOFA link above.
Filling in the form
- First Value: choose Passport Number and enter your passport number in the blank field.
- Second Value: choose First Name and enter your first name in the blank field.
- Nationality: select your nationality from the drop-down menu.
- Captcha: enter the numbers shown, then click Inquire.
- If your eVisa has been issued, it will appear on the next screen. Print and save it.
If you have any further issues, contact your assigned partner. You can also reach Al Bait Guests at care@albaitonnusuk.com, visit albaitonnusuk.com, or follow @albaitonnusuk.